Deploying files to Intune-managed devices can present challenges. Previously, I utilized a Win32 App (intunewin) for deploying fonts, Teams backgrounds, and license files to Windows devices. In this post, I will guide you through the process of creating an application in the .pkg format to securely deploy your files on macOS devices.
Different Ways, One Goal
You’ll encounter various strategies and ideas for deploying files to your devices. The most frequently mentioned methods include:
- Downloading from Azure Blob Storage.
- Downloading from a publicly accessible endpoint (for example, GitHub, SharePoint, etc.).
However, both approaches raise security concerns for me. There are scenarios where making a file publicly accessible may not be advisable, or you might prefer not to embed the Blob Storage Access Key directly in your script (although using certificates is an option, it complicates the process further).
This is why I’ve considered creating a package to assign to devices for file deployment needs. In my most recent project, I crafted a package specifically for deploying Teams backgrounds.
Advantages:
- No need to host files remotely or in the cloud.
- No need for secrets in scripts.
(Potential) Disadvantage:
- Initial Package Application (takes 10 Minutes)
- You need a MacOS Device to package your files.
In the following example I will package files to deploy Background Images for Teams 2.0.
Create the PKG Application
Lets start with the command we will execute to create the .pkg to understand the following steps.
pkgbuild --root --scripts --identifier --install-location --version Application.pkgHere is the command that I used to create the package for the Teams Backgrounds:

Lets go over each one of the parameters:
pkgbuild: This is the command-line tool used to create installer packages for macOS.--root Content: The--rootoption specifies the path to the root directory of the files that you want to include in the package. In this case, “Content” is the directory that contains the files you’re packaging.--scripts Scripts: The--scriptsoption points to a directory containing scripts that are run during the installation or removal of the package. “Scripts” is the directory where these scripts are located.--identifier com.ugurkoc.teamsbackground: The--identifieroption specifies a unique identifier for the package, usually in reverse domain name notation. Here, “com.ugurkoc.teamsbackground” is the identifier, which should be unique to avoid conflicts with other packages.--install-location /var/tmp: The--install-locationoption specifies the directory on the target system where the files should be installed. “/var/tmp” is the location where the package will be installed. You have to provide a install location for pkgbuild. I just move the files from there to my desired location. You can remove the files in tmp after the has run successfully.--version 1.0: The--versionoption sets the version number of the package. “1.0” is the version number in this case.TeamsBackground.pkg: This is the name of the output file for the package. “TeamsBackground.pkg” will be the name of the installer package created bypkgbuild.
Step 1: Create the folder structure
The organization of your folders plays a crucial role in the pkgbuild command’s functionality. It specifically searches for two directories: Content and Scripts. Here’s how it should be arranged:

- The Scripts folder contains a postinstall script, which I’ve converted into a binary executable. Upon the installation of your pkg, this postinstall script is the first item that will be executed.
- The Content folder houses the files you wish to deploy on the device.
Step 2: Create the postinstall script
The postinstall script is located within the Scripts folder. In my specific example, which focuses on deploying Teams backgrounds, I’ve also incorporated a log file that gets created during the installation process. This log file is invaluable for troubleshooting any issues that may arise with the script or the content file copying process.
Here is my full postinstall script:
https://github.com/ugurkocde/Intune/blob/main/MacOS/Create%20pkg%20/postinstall
You have to give the script execution permissions and also delete any file extensions like .sh from the file.
This is how you can change the file permissions:
chmod a+x postinstallStep 3: Execute pkgbuild to create the .pkg file
Finally we can run the command from above in the terminal (you have to execute this inside the folder where the Content and Scripts folders are located):
pkgbuild --root Content --scripts Scripts --identifier com.ugurkoc.teamsbackground --install-location /var/tmp --version 1.0 TeamsBackground.pkgThis a screenshot from the terminal after running the above command:

You will now find the .pkg file in the same folder which you can upload to Intune.
Upload the pkg to Intune
After creating the pkg, we have to upload and assign the package now on Intune.
Go to the MacOS Apps: https://intune.microsoft.com/#view/Microsoft_Intune_DeviceSettings/AppsMacOsMenu/~/macOsApps
- Click on Add.
- Select app type: macOS app (PKG).
- Upload the file now.
- Fill out the required fields.
- Assign the Application to your MacOS Devices or Users.
The application is designed to install silently, requiring no user interaction on the assigned devices. Given that Intune deploys apps in the System (Root) Context, it’s necessary to modify your scripts to identify the logged-in username. I have incorporated this adjustment into my script to demonstrate how this can be achieved.
Check installation on the MacOS Device
Here is the /var/tmp/ folder with the Backgrounds Folder from the Content Folder inside the pkg file. There is also the .log file that has been generated by the script.
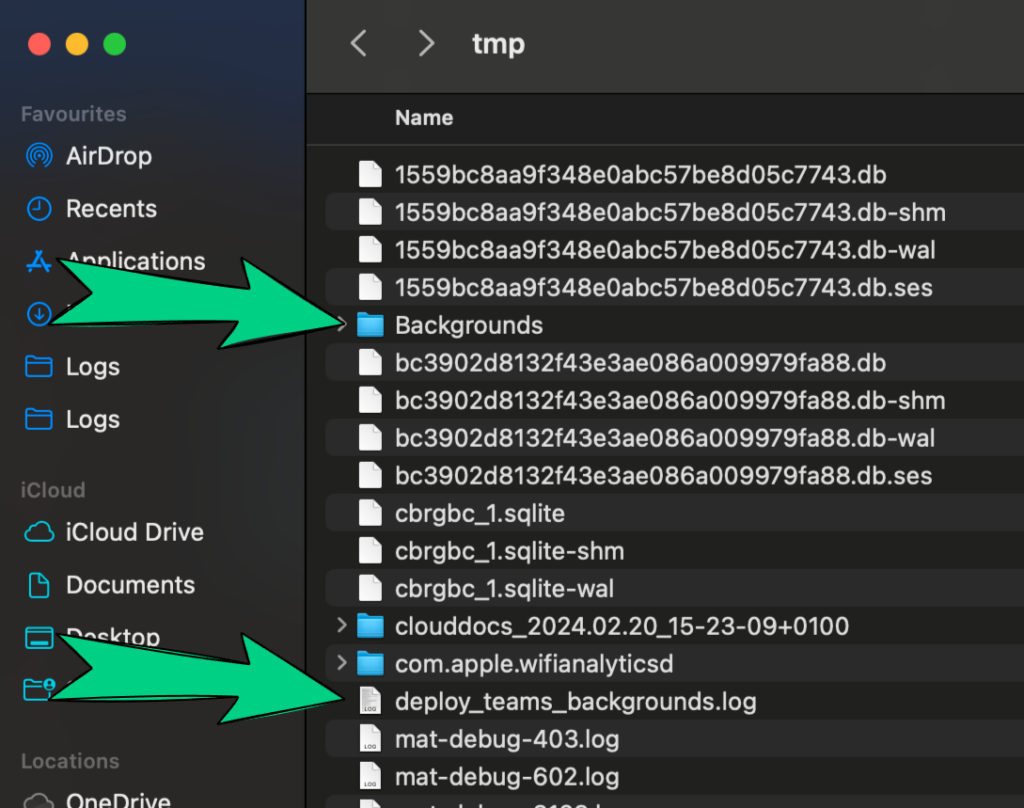
Everything looks great and the deployment of the files was successful.
Conclusion
After going through the steps three times, in the future you will be very fast in packing the files and deploying them on your MacOS Devices. I hope that this guide was helpfull for you.
Any questions or suggestions? Message me on Twitter @ugurkocde